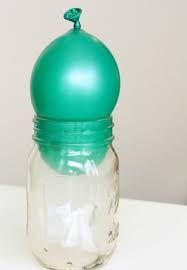
CAN YOU PUT A BIG BLOWN BALLOON INSIDE A NARROW JAR WITHOUT DEFLATING IT?

What you need:

A glass jar, a balloon, a bowl of ice water, a piece of string

What you do:

  • Blow up the balloon so that it is just a little too big to go into the jar.
  • Tie the end of the balloon with a piece of string so that the air cannot get out.
  • Now place the balloon in a bowl of ice water.
  • After some time take the balloon out and try to put it into the glass jar.

What you find:

The balloon goes inside the jar.

Why does this happen?

When you put the balloon in the cold water. the air in it gets cooled. The cooled air contracts and so the balloon diminishes in size and is able to go into the jar.

Picture Credit : Google 

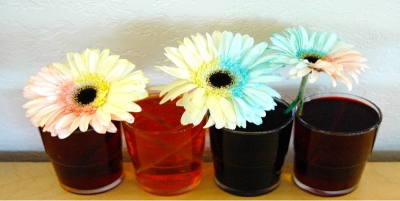
Can you change the colour of flowers! Here's how...

What you need: White flowers with long stems, like tuberoses, jasmine or zinnia, food colouring, water and a plastic container.

What you do:

1. Fill the plastic container with water and add some food colouring.

 2. Cut the ends of the stems of the flowers and put them in the coloured water.

 3. Check the next day.

What happens?

The petals would have tumed the colour that you added to the water!

Why?

 The plant draws up water from the soil through the roots and then up through the stem. As the water evaporates from the tiny pores in its leaves and flowers, the plant draws up more water. Since the flowers in the container didn't have roots, they sucked up the water through the stem.

 Try this!

Split the stem vertically down the middle and plant the halves in containers with water of two different colours. What happens?

 Fact of the matter

Plants draw up water from earth continuously. Cut flowers have to be put in water right away, otherwise an air bubble will form in the stem. Then the flowers will be unable to draw up any more water!

Picture Credit : Google 

When you don’t clean the ceiling fan for some time, do the blades get uniformly dirty or do they get dirty in parts? Let’s find out.

What you do:

  • Ask your mom not to clean the ceiling fan in your room for two to three weeks
  • Observe the blades of the fan at the end of this period.

What you find:

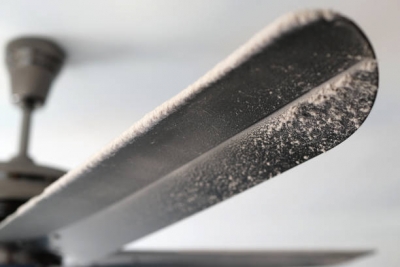
That most of the dirt collects on the leading edges of the blades.

 Why does this happen?

Static electricity develops on the blades of the fan when they are in motion due to friction with the air The static electricity attracts dust particles. As the edges of the blades are the first to come into contact with the surrounding air, more dust collects on them than on the other parts of the blades.

Picture Credit :Google 

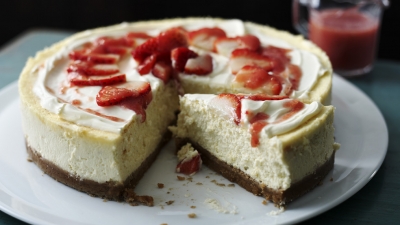
How do you make cheese cake?

Cheese cake

Ingredient

Graham crackers: 1 cup

Unsalted butter: 4 tbsp

Heavy cream: 1/2 cup

Cream cheese: 8 ounce (1 cup)

Sugar 1/3 cup

Lemon juice: 1 tsp

A few slices of fruits (mango, kiwi, strawberry, black berry. etc.)

Method:

First line a 4x7 inch pan with wax paper or parchment paper. Mix Graham crackers and butter well to combine. Refrigerate for at least 30 minutes.

Using an electric mixer, beat the cream cheese and sugar in a large bowl on medium high speed until smooth. Reduce the mixer speed and gradually add cream and lemon juice.

Now increase the speed to medium high until a stiff peak forms. Spread the cream cheese evenly over the prepared crust, refrigerate for at least 4 hours. Just before serving, top with fruits.

Picture Credit : Google

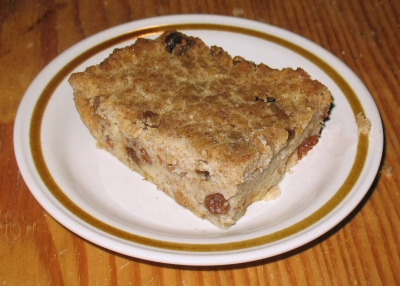
How do you make coconut bread pudding?

Coconut bread pudding

Ingredients

Bread, toasted and cut into bite-sized pieces: 5 slices

Butter: 1 tbsp

Chopped nuts: 1/4 cup

Coconut milk: 1 can

Eggs: 3

Sugar: 1 cup

Ground cardamom powder: 1 tsp

A pinch of salt

Method:

Preheat oven to 325 degrees C. Butter a baking dish (8x8). Arrange the bread pieces in the dish and evenly sprinkle chopped nuts on top.

In another bowl, whisk together coconut milk, sugar, egg, cardamom powder and salt. Pour the mixture over the spread out bread pieces, pressing down with a spoon to make sure they are soaked.

Bake for 45 minutes or until set. The centre should spring back when touched. Allow it to cool for 15 minutes before serving.

Picture Credit : Google

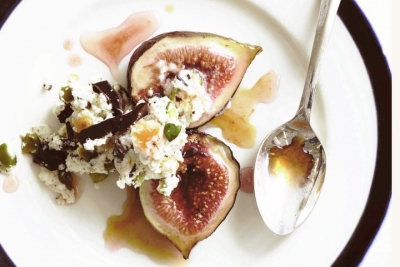
How do you make caramelised figs with yoghurt?

Caramelised figs with yoghurt

Ingredients

Plain or lightly sweetened yoghurt: 400 ml

Fresh figs, washed, dried and cut in half: 4

Chopped almonds 2 tbsp

Honey: 2 tbsp

A pinch of cardamom powder

Method:

Spoon the honey into a small pan and heat it over a medium flame. Place the figs cut-side down on the honey and cook until honey starts to bubble and caramelise and the figs are softened lightly.

Sprinkle some cardamom powder and spoon the figs over the yoghurt, drizzling any remaining honey on top.

Sprinkle chopped almonds and eats while the figs are still warm.

Picture Credit : Google

How do you make green tea shake?

Green tea shake

Ingredients

Chilled milk: 1 cup

Brewed green tea cooled: 3/4 cup

Honey (adjust to taste): 1 tbsp

Vanilla ice cream: 1-2 tsp

A handful of ice-cubes

A drop of green food colouring (optional)

Method:

  1. Steep 2 cups of boiling water with two green tea bags. Let sit for 10-15 minutes to make sure tea is very strong. Pour tea into ice cube trays to freeze. Let freeze solid.
  2. Add green tea ice cubes to blender with other ingredients.
  3. Blend until smooth and serve immediately.

Picture Credit : Google

How to become a travel agent?


Be a Travel Agent


Part of a travel agent's job is to create an itinerary which is a route for your journey. Imagine that you are a travel agent planning a trip for yourself and a friend to an exciting place.


You Will Need:


  • white paper a stapler

  • newspapers and magazines that an adult has given you permission to cut up

  • scissors

  • crayons or felt-tipped pens


What To Do:


1. Decide how many days you and your friend would like to travel Then staple several sheets of paper together to make a short booklet. Allow two pages for each day of your trip,


2. Look through newspapers and magazines or print out photos from the Internet. Cut out pictures of interesting places, such as museums, monuments, amusement parks, zoos, and nature parks, that you would like to visit. Remember, you're not really travelling, so anything goes! Also cut out pictures of hotels, motels, camping grounds, and restaurants where you would enjoy staying and eating.


3. Now arrange your pictures so that you have two or three places to visit, one place to stay, and two or three restaurants for each day of your holiday.


4. Glue the pictures into your booklet. You might want to put numbers by each picture to show what you would do first second, and so on. You also could put the words breakfast, lunch, and dinner next to the restaurants to show where you would eat each meal.


Now you are ready to present the "itinerary" to your friend. "Bon Voyage!" This is French for "have a good trip!"


Picture Credit : Google


Are you a terrific traveller?


Terrific travellers are clever and ready for new sights, new sounds, new tastes, and new experiences. They respect other people's languages, customs, and foods, even though they might seem strange at first. Terrific travellers expect surprises, and they know that each journey is a chance to learn something new.


Take this quiz to find out if you are a terrific traveller. You can pick more than one letter for each number. Then count the number of a's, b's, c's, and d's you score.


1. You are taking a stroll down a wooded path. You spot a flower you've never seen before. You:


a. pick the flower so no one else will find it.


b. ignore the flower. Woods are boring!


c. look up the flower in your nature guide and make a sketch of it in your notebook.


d. have a contest to see how many unusual flowers you can find.


2. It is late afternoon in a Spanish village. All the shops and restaurants are closed for siesta. You:


a. bang on the windows and tell everyone to wake up because you are hungry


b. pout in your hotel room.


c. use the time to read about local customs.


d. have a picnic in the park with the snacks


you packed in your backpack.


3. It is your only day to go to the beach. Suddenly, it starts to rain. You:


a. tell everyone that your trip is ruined and you want to go home.


b. sit in your room all day and watch it rain.


c. use the time to write postcards to your friends.


d. go to a museum you hadn't planned to visit.


4. You are in a restaurant and the waiter brings you an odd-looking dish you've never had before. You:


a. pinch your nose and yell "Ugh!"


b. push the plate away from you when no one is looking.


c. ask the waiter to tell you the name of the dish and how to pronounce it.


d. try the dish even though you don't know whether you will like it.


5. Your parents tell you that you are going to an art museum instead of the amusement park. You:


a. plan to bring your in-line skates so you can play tag with your sister.


b. sigh loudly and dawdle behind your parents once you get there.


c. take the museum tour and learn about the paintings.


d. go on an art museum treasure hunt.


What Your Score Means:


Mostly A's:


Tourist, go home! You won't enjoy your trip, and you may keep other people from enjoying theirs.


Mostly B's:


B is for boring. You need to put more effort into your travels if you want to have fun!


Mostly C's:


Your willingness to learn about the places you visit makes you a terrific traveller.


Mostly D's:


You're terrific, too. Your adventurous spirit guarantees that you will have fun wherever you go.


Picture Credit : Google

How do draw a map to scale?


Draw a Map to Scale


You don't need rulers or tape measures to draw a map to scale. Make different maps of your own room-using just your feet!


You Will Need:


  • graph paper

  • crayons or felt-tipped pens

  • a ruler


What To Do:


1. Select two things in your room, such as your dresser and bed, or the door and the window.


2. Estimate, or guess, the distance between the two objects you have chosen.


3. Now use steps to measure the distance. Walk in a straight line, placing your feet from heel to toe. Count how many steps it takes to get from one object to the other. Write down that measurement.


4. Decide on a scale, such as the length of one square of graph paper equals one step Draw a map of your room using the measurements (in steps) you just took. Use your scale to show the distance between the two things you chose. At the top or bottom of the map, mark the map scale.


5. Now draw more maps to different scales. For example, one step equals two squares.


6. Give each of your maps a title, such as "first map". "second map", and "third map".


Now you are ready to compare your maps. How are they alike? How are they different?


Picture Credit : Google


How to make your neighbourhood map?


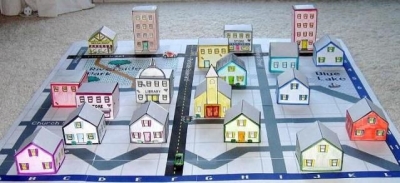
One way to help your friend find your house quickly and easily is to draw a map. It's easy to make a map of your neighbourhood, and its fun too


You Will Need:


  • plain white paper

  • pencils

  • a ruler

  • crayons or felt-tipped pens

  • tracing paper


What to Do:


1. First, walk around your neighbourhood and make a list of the things you want to show on your map. You may want to ask an adult to help you. You might want to show your house, a friend's house, the park, or your school. Think about where places are, how far apart they are, and what shape they are. As you walk, write down the names of the streets in the order in which you get to them. Which buildings and streets would help someone find your house?


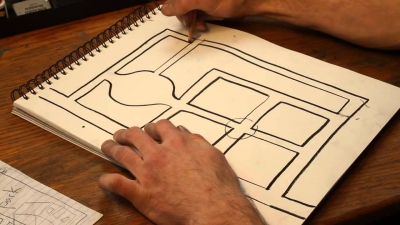
2. Next, draw your map. Draw the streets in pencil and show where they cross. Print the name of each street on your map.


Then add shapes that stand for your friend's house, a postbox, or a shop. You might also need to add streets that aren't on the map. Label each street. Then add labels for important places such as your home and school.


3. Now colour your map. Use different colours for such areas as houses, streets, and parks. At the bottom of the map, list what each colour stands for.


To find out whether your map works, let a friend use it to try to find your house or another place on your map.


Picture Credit : Google


How to design your own house?


What House Will You Build?


Here is your chance to design your own house.


Where You Live


1. An area close to a swamp. Floods occur quite often.


2.A very rainy place.


3.A dry rural place with few trees.


4.A crowded big city with buildings that are homes for many people.


5.A place close to a river, lake, sea, or ocean.


Materials for a House


A. mud for making bricks


B. wooden poles on which to build your house


C. waterproof tiles for your roof


D. concrete bricks and steel beams


E. wood, fibreglass, or aluminium for making a house that floats


Picture Credit : Google


How to make your own friendship bracelet?


Weave Your Own Friendship Bracelet


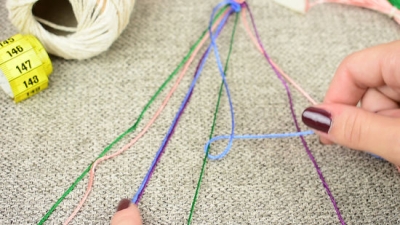
In many countries, people make rugs, baskets, and blankets. They make them by weaving, Weavers use a machine called a loom to cross threads over and under one another. The threads are made of cotton, silk, or even grass. Sometimes the threads are coloured with dyes made from plants. You can make a simple hand loom out of straws and use it to weave a bracelet for your friend.


You Will Need:


  • 1 metre thin cotton thread

  • 2 plastic drinking straws, each cut in half

  • different-coloured yarn


What To Do:


1. Cut the thread into four equal pieces and pass each piece through a straw. Tie the four ends above the straws into a knot.


2. Knot the other end of each piece of thread.


3.Tie a piece of yarn to the thread just below the top knot.


4.Weave the yarn under and over the straws from side to side. Use your fingers to push up each row of yarn onto the thread and slide the straws down. To change colours, tie a new piece of yarn to the end of the first one and weave in the loose ends.


5. Make your bracelet long enough to tie around your friend's wrist. When your bracelet is the length you want, remove the straws. To fasten the last row, tie the end of the yarn to the piece of the thread. Then tie a knot with the two pieces of thread on the left. Repeat with the pair on the right. Finally, tie together the four thread pieces with another knot.


Now you are ready to give your bracelet to a friend!


Picture Credit : Google


How to make your own continent map?


Make Your Own Continent Map


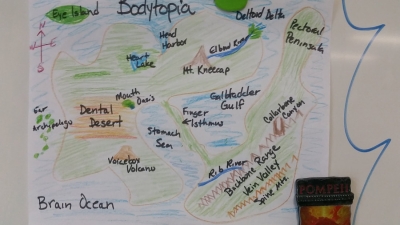
Just as you can learn a lot about a place by looking at a map, you can learn a lot by making your own map. Choose a continent in this chapter that you would like to learn more about, and map it!


You Will Need:


  • books or encyclopaedia articles about your favourite continent

  • a pencil

  • a large sheet of paper crayons or felt-tipped pens


What To Do:


1. Read about the continent and answer the following questions: What is the tallest mountain? What is the longest river? What is the largest lake or desert What animals live there? What are the biggest cities?


2. Look through encyclopaedias and other books to find different maps of your continent. How do these maps show important information, such as the locations of mountains, rivers, and large cities?


3. Trace or copy the outline of the continent onto the large sheet of paper.


4. Now use a pencil to fill in the map outline. Choose symbols to show cities, rivers, mountains, deserts, and the animals that live in different places on the continent.


5. Colour your map. Use green for land, blue for water, and brown for mountains.


6. Decorate the border of your map with pictures of the continent's people, animals, and any other features you want to show.


Now, laminate your map or put it in a plastic cover.


Picture Credit : Google